
HPLC MS Analysis for Peptide Research: A 2026 Guide
You're standing at the bench with a peptide vial, a vendor purity claim, and a
You've got a 5 mg vial of lyophilized AOD-9604 on the bench, your assay schedule is set, and the only thing between a stable powder and a usable research stock is the reconstitution step. During this step, a lot of otherwise solid work often starts to drift. A rushed solvent addition, a sloppy concentration calculation, or poor storage practice can skew dosing, reduce stability, and leave you wondering whether the biology changed or the prep did.
If you're looking for how to reconstitute AOD 9604 5mg correctly, treat it as an SOP, not a convenience step. Reconstitution determines the concentration you'll carry into every draw, every replicate, and every comparison. It also determines whether the solution stays clear, stable, and usable long enough to support repeatable work.
AOD-9604 arrives in a form designed for stability. That stability ends the moment you reconstitute it, which is why the first handling step matters so much. If the powder is mixed carelessly, the resulting solution may still look usable while carrying a concentration error or dissolution problem that won't show up until your data stop matching between runs.
In practice, reconstitution is not just “adding water.” It's a controlled conversion from a dry mass to a liquid stock with a known concentration. Every downstream action depends on that stock being what you think it is. If it isn't, the error doesn't stay in the vial. It follows every aliquot, every dose calculation, and every result.
Practical rule: The cleanest experiment in the world can't rescue a poorly prepared stock solution.
That's why experienced labs build consistency into the prep itself. The vial and diluent are brought to room temperature before mixing. Solvent is added slowly. The stream is directed against the glass, not blasted onto the peptide cake. The vial is swirled or rolled gently, never shaken. Each of those choices protects solubility and supports a concentration you can trust across repeated use.
When people ask how to reconstitute AOD 9604 5mg, they usually want a volume and a mixing technique. They also need the rationale. The rationale is simple. Reconstitution controls reproducibility. If this step is standardized, later comparisons are far more defensible.
Sterile technique starts before the first needle touches a stopper. If you have to pause mid-process to find a syringe, swap out a wipe, or rethink the volume, you've already increased the chance of contamination or handling error. Set the bench before you uncap anything.
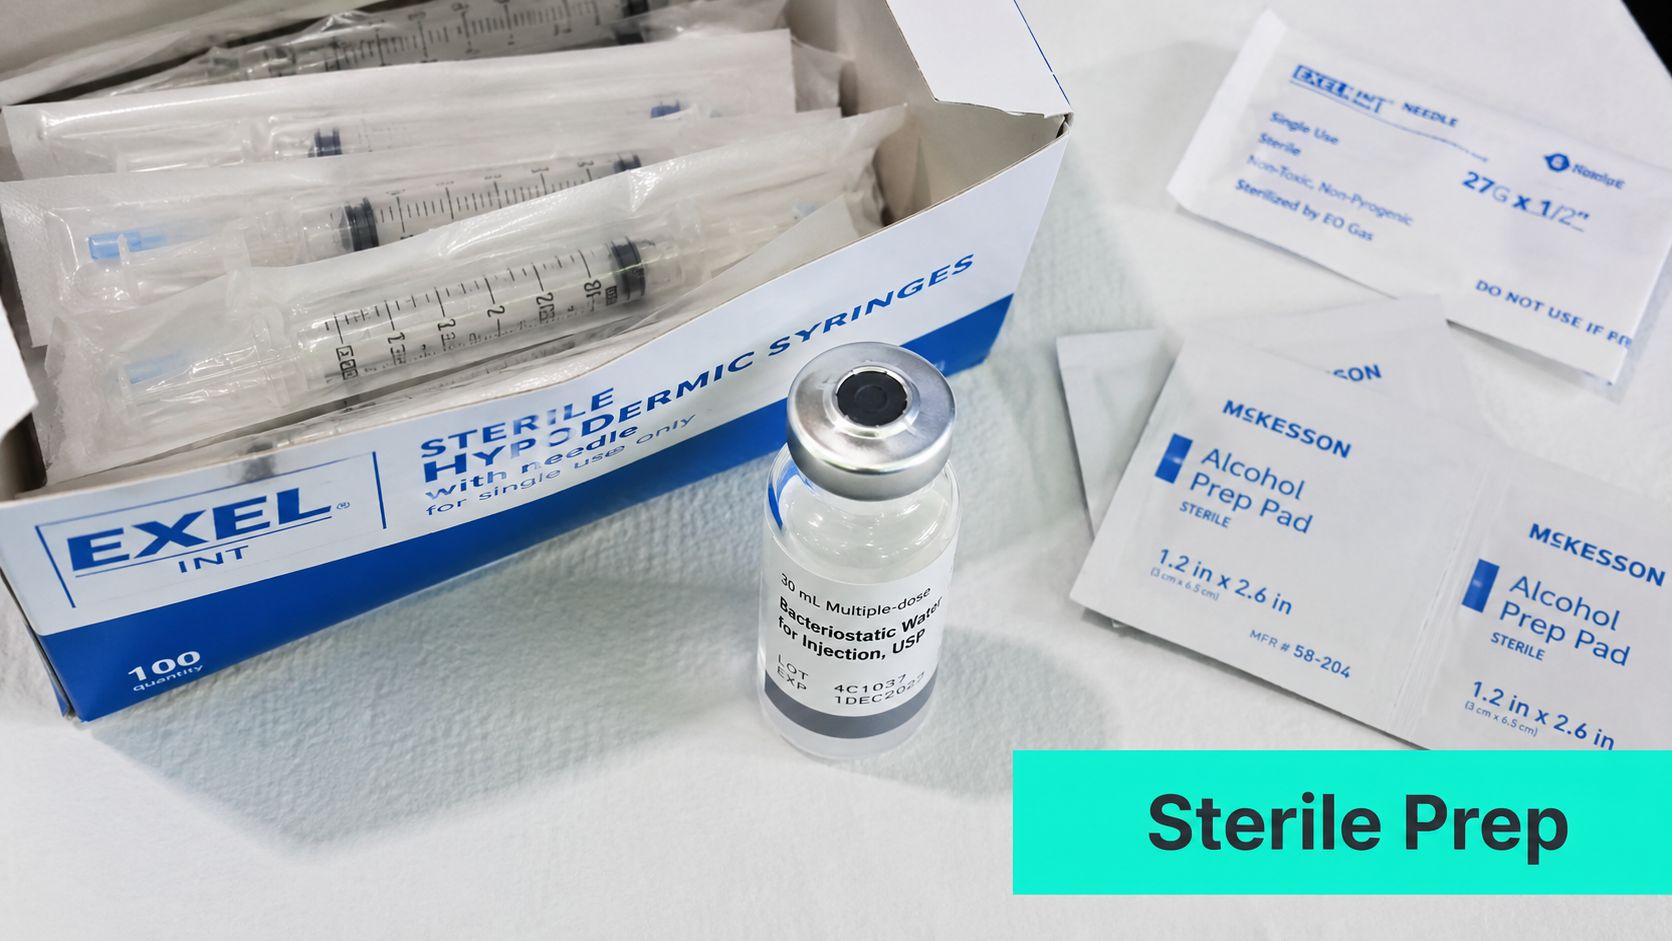
Use a disinfected work surface. A laminar flow hood is preferable when available, especially if the reconstituted material will move into sterility-sensitive work.
Keep these items ready:
A practical overview of what bacteriostatic water is used for helps clarify why many labs select it for multi-use peptide preparation.
Bacteriostatic water isn't just convenient. It supports a workflow where the vial may be accessed more than once during its usable life. That only works if you protect the solution from contamination at every access point. Wipe the stopper every time. Use a fresh sterile syringe. Keep the vial open only as long as necessary.
Cross-contamination usually starts with avoidable habits:
Sterility protects more than the vial. It protects your interpretation of the result.
There's also a chemical side to bench discipline. Peptides don't need rough treatment to fail. Repeated punctures, unnecessary room-temperature exposure, and casual handling all make the prep less reliable. If your standard is repeatable data, the materials setup has to support that standard from the first minute.
AOD-9604 reconstitution becomes straightforward once the math is fixed and repeatable. For a 5 mg vial, the standard protocol cited here uses 2.0 mL bacteriostatic water per 5,000 mcg of peptide, producing 2,500 mcg/mL. The same protocol shows the full three-step calculation: convert 5 mg to 5,000 mcg, divide by 2.0 mL to get 2,500 mcg/mL, then divide the intended dose by that concentration. Using that setup, a 300 mcg target dose requires a 0.12 mL draw volume. The same reference also notes that a 0.1 mL deviation can create an 8.3% dosing error, which is exactly why this stage has to be standardized and documented in the same way every time in preclinical work (AOD-9604 reconstitution protocol and concentration math).
The math should be done in the same order every time:
Convert the vial mass
Divide peptide mass by diluent volume
Calculate your draw volume
That gives you a stock that is easy to work from and easy to verify later in the notebook.
The table below keeps the working relationship visible during prep.
| Target Concentration (mcg/mL) | Bacteriostatic Water to Add (mL) | Resulting Volume for 300 mcg Dose (mL) |
|---|---|---|
| 2,500 | 2.0 | 0.12 |
| 1,250 | 4.0 | 0.24 |
| 1,000 | 5.0 | 0.30 |
Only the 2.0 mL to 5 mg setup is the cited standard in the verified protocol above. The additional table values are mathematical examples derived from the same mass-to-volume relationship so you can see how concentration changes draw volume.
A good concentration is one your team can calculate once, label clearly, and reproduce without reinterpretation.
The hidden benefit of standardizing the concentration isn't convenience. It's comparability. If one operator prepares a more concentrated stock and another prepares a more dilute one, both may still believe they're delivering the same amount. Unless everyone calculates from the same framework, dose drift creeps into the experiment.
The same source also flags an important operational point tied to this concentration setup. Gelling is more likely when cold water is used or when the solvent is injected directly onto the lyophilized cake. That means the math and the physical mixing technique are linked. The correct volume alone won't rescue a poor transfer method.
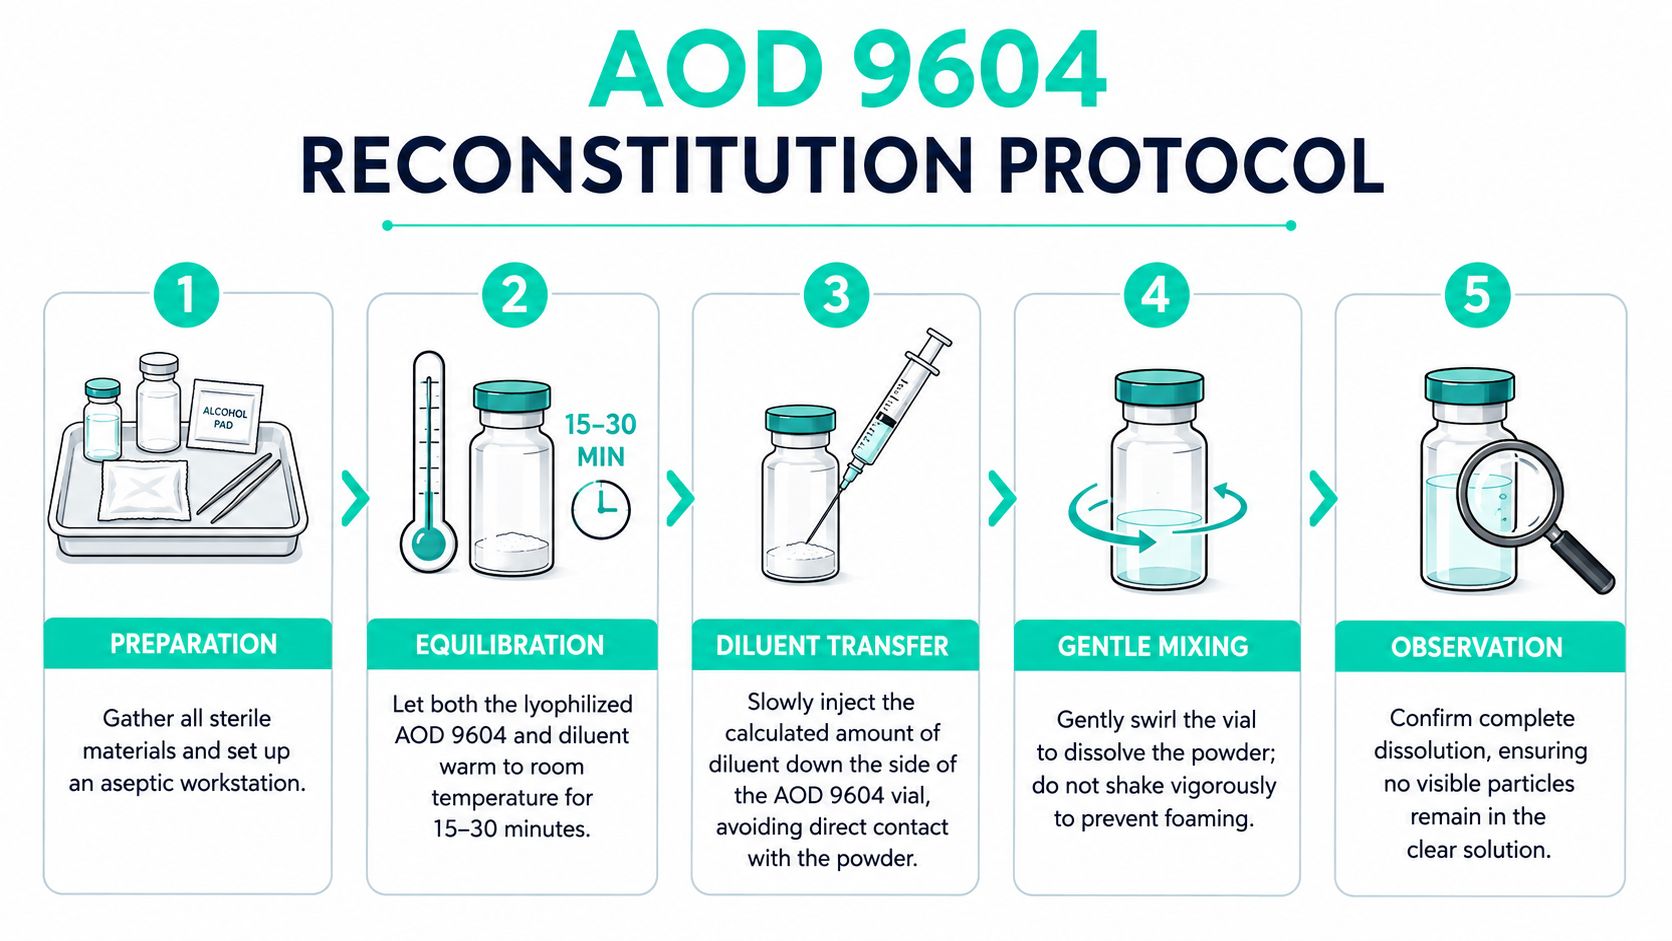
Technique matters most when the solvent first enters the vial, as this critical juncture often leads otherwise careful researchers to create cloudiness, foam, or partial dissolution by moving too fast.
If you want a broader operational reference on peptide reconstitution methods, keep it nearby while standardizing your own bench procedure.
Start with room-temperature materials. The vial and the bacteriostatic water should equilibrate before you begin. Cold diluent is one of the known contributors to gelling in this preparation workflow.
Follow a controlled sequence:
That sidewall delivery matters. It reduces the mechanical shock at the powder surface and gives the peptide a better chance to hydrate evenly.
If you hit the cake directly, you may not see the problem immediately. The solution can trap poorly dissolved material and still look deceptively acceptable at first glance.
A visual walkthrough helps when training new personnel:
Once the diluent is in the vial, resist the urge to shake. Vigorous agitation is one of the fastest ways to create foam and inconsistent dissolution.
Use one of these gentler approaches instead:
What you want is a clear solution without visible particles. What you don't want is froth, persistent cloudiness, or stringy gel behavior. If it doesn't dissolve cleanly with patient swirling, don't “fix” it by shaking harder. That usually makes the diagnosis worse.
The best operators are boringly consistent at this stage. Same temperature. Same injection angle. Same mixing style. Same observational check before the vial moves to storage. That consistency is what makes one batch comparable to the next.
Once mixed, the vial becomes a time-sensitive stock solution. You no longer have the forgiving storage behavior of the lyophilized state. From this point forward, handling discipline is part of data protection.
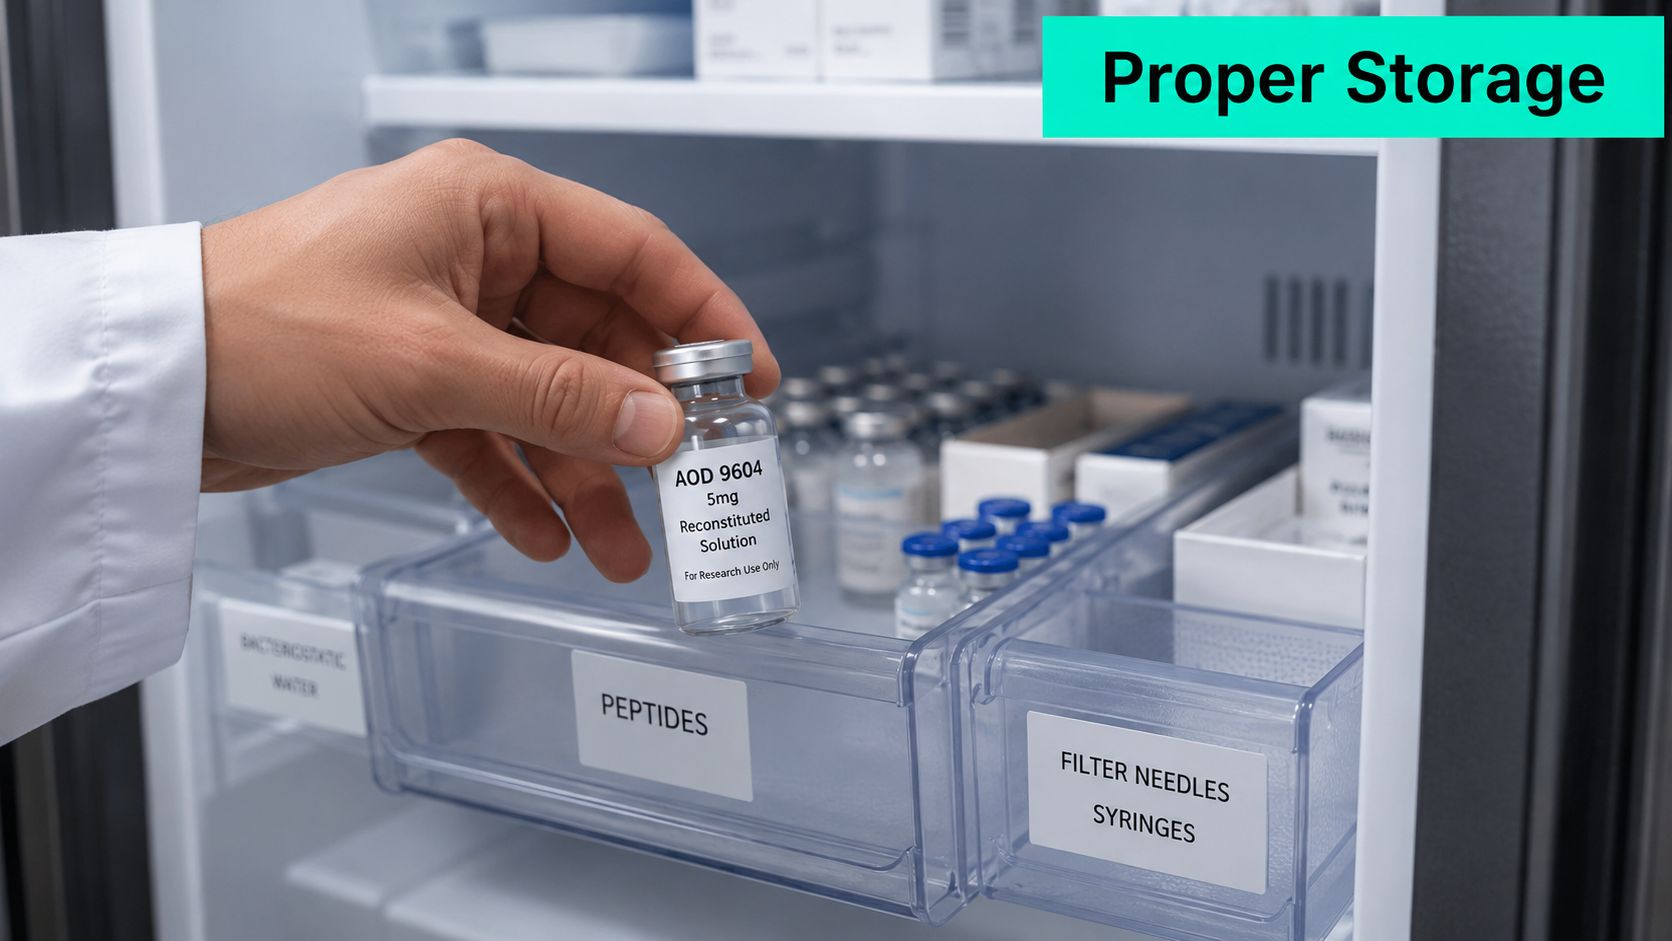
The verified storage guidance is specific. After reconstitution with bacteriostatic water, AOD-9604 should be stored immediately at 2–8°C (36–46°F). The stated stability window is 28 to 45 days, but the same guidance sets a hard expiration at day 28, after which any remaining solution should be discarded regardless of volume. It also warns against freezing and direct light exposure, and notes that cloudiness persisting for 5–10 minutes after gentle swirling indicates incomplete dissolution or possible degradation rather than a successful prep (storage guidance for reconstituted AOD-9604).
Treat these as absolute:
The reference links that day-28 cutoff directly to data validity. Past that point, you're no longer working from a stock with an acceptable reliability window.
A peptide vial without a label becomes a future error source. Use a permanent marker and write:
A dedicated storage guide for reconstituted peptides and handling practices can help align labeling and refrigeration habits across the lab.
The vial should tell the next operator everything needed to use it correctly, or not use it at all.
That's the essential purpose of labeling. It's not clerical. It prevents a concentration mix-up, a stale-vial reuse, or a quiet protocol drift between shifts.
Most AOD-9604 vials dissolve cleanly with proper temperature control and gentle mixing. Some don't. When the solution stays cloudy, the right response is measured correction, not more force.
A verified troubleshooting protocol addresses the stubborn batches. When AOD-9604 does not fully dissolve in bacteriostatic water alone, the guidance calls for incremental pH adjustment using 0.6% to 1.0% acetic acid. Adding a single drop, approximately 0.05 mL, often clears cloudiness within 10 minutes of slow rotation, with a reported solubilization success rate exceeding 95% for difficult batches. The same protocol notes that reconstituted AOD-9604 retained greater than 98% purity for 30 to 45 days when promptly returned to 2–8°C, while room-temperature exposure promoted degradation and gel formation within 24 hours (advanced AOD-9604 solubilization protocol).
Use that intervention carefully. Add the acid incrementally, then rotate slowly. Don't dump in extra solvent and hope for the best. If the solution responds, it usually does so without drama.
If particulate matter remains after the acid adjustment, the same verified guidance states that the solution should be passed through a 0.22 µm syringe filter before cell culture use. That removes insoluble aggregates and supports sterility in sensitive assay systems.
This is the practical hierarchy:
Don't normalize a cloudy vial. If the peptide hasn't dissolved correctly, your concentration may not be what your calculation says it is. At that point, the issue isn't cosmetic. It's analytical.
Celonyx Labs supplies research peptides for laboratory investigators and emphasizes stated 99% purity and independent third-party testing in its published quality information. If you need a source for research-use material, batch documentation, and ordering support, review the catalog at Celonyx Labs.
You're standing at the bench with a peptide vial, a vendor purity claim, and a

PBS is a water-based salt solution of NaCl, KCl, Na2HPO4, and KH2PO4, adjusted to about

You're standing at the bench with a lipolysis assay ready to run, and the core
FOR RESEARCH USE ONLY. Products sold by Celonyx Labs are intended exclusively for laboratory and scientific research. They are not intended for human or veterinary use, consumption, diagnosis, treatment, cure, or prevention of any disease. By purchasing from this site, you acknowledge that you understand the intended research purpose of these materials and agree to comply with all applicable laws and regulations.