

Is bacteriostatic water the same as sterile water? No 2026
Is bacteriostatic water the same as sterile water? No. Compare preservatives, vial handling and peptide
You've got a fresh lyophilized vial on the bench, the solvent is drawn up, and the pressure is real because this next move affects every result that follows. How to reconstitute peptides is not a casual prep task, it's a controlled handling step that protects structure, reduces contamination risk, and keeps the solution usable for the work you want to do. If the first minutes go wrong, the cost shows up later as cloudiness, poor recovery, inconsistent dosing, or data you can't trust.
A peptide vial looks simple when it arrives, but what's inside is a fragile solid form designed to be protected until you decide how to bring it into solution. That transition matters because the chemistry changes the moment solvent touches the cake, and the way you handle that contact can help preserve the peptide or damage it before the assay ever starts. The historical shift in peptide work has been from rough mixing toward aseptic, low-shear technique, because that approach reduces foaming, contamination, and the kind of mechanical stress that can compromise integrity.
The point isn't just to make the powder disappear. The point is to make a solution that behaves predictably in storage, pipetting, and downstream use. A technique that seems faster at the bench can easily cost you more time later if it creates aggregation, leaves visible particulates, or forces a full restart.
Practical rule: if the vial looks disturbed, foamy, or cloudy right after mixing, the problem started at the reconstitution step, not at the assay.
A careful workflow also helps protect scarce material. Many peptide experiments begin with a small vial and a long list of expectations, so every drop needs to be handled like it matters. In practice, that means respecting the chemistry of the peptide, the sterility of the workspace, and the limits of the solvent you choose.
Researchers often talk about reconstitution as preparation, but it's really the first experimental variable. Solvent choice, mixing force, and temperature all shape what the final solution looks like and how stable it stays after preparation. One reason this step deserves attention is that the right answer isn't universal, it depends on the peptide and the downstream application, which is why a one-line shortcut usually fails.
Before you puncture anything, make the decision that prevents most avoidable failures, which solvent matches this peptide and this assay. The common mistake is assuming one diluent fits every vial, but peptide chemistry doesn't work that way. Hydrophobic peptides may not dissolve cleanly in plain water, bacteriostatic water can interfere with some sensitive cell-based assays, and pH or ionic strength sometimes needs adjustment to prevent precipitation or aggregation, as noted in this troubleshooting guide on solvent choice and cloudiness.
The vial label tells you what you physically have in hand, and the Certificate of Analysis tells you what the material has already been shown to be. Check peptide name, net mass, and any handling notes before you calculate a solvent volume or choose a storage plan. Purity and identity data matter because they inform how cautiously you should handle the material, especially if the intended application is sensitive to preservatives or residual solvents.
The material list should be simple, but each item has a purpose. A sterile syringe gives you volume control. An alcohol swab protects the stopper. A clean work surface reduces the chance that the solution becomes a biology problem instead of a chemistry problem.
Bacteriostatic water is commonly used when the vial may be accessed more than once, but it isn't always appropriate. Sterile water or other dilute solutions may fit specific applications better when preservatives are a concern. If a peptide is prone to precipitation, the underlying issue may be solubility, not “bad” technique, and the solvent may need to support the molecule instead of merely wetting it.
If you want a practical reference on the consumables side of that decision, this overview of bacteriostatic water and syringes is worth keeping handy during procurement and bench setup.
| Solvent | Best For | Considerations |
|---|---|---|
| Bacteriostatic water | Multi-use access, routine lab reconstitution | Preservative exposure may be unsuitable for some sensitive assays |
| Sterile water | Single-use or preservative-sensitive workflows | No preservative, so handling window is narrower |
| Dilute acidic or basic solution | Peptides that need pH support to stay soluble | Should be matched to peptide chemistry, not used by default |
| Buffered or salt-containing solution | Specific assay conditions | Ionic strength can help or hurt, depending on the peptide |
Once the solvent is chosen, set out only what you need. Open-container time should be brief, and every step should support a clean transfer. The best material choice in the world won't save a vial if the workspace or tools compromise it before mixing even starts.
Costly errors frequently originate here. The numbers look small, but the effect is not. Reconstitution sets the concentration that governs dosing, later dilution, storage, and any comparison between batches, so a loose estimate here carries forward into every later step.
The working equation is simple enough to keep in your notebook or SOP:
Volume of solvent (mL) = Amount of peptide (mg) / Desired concentration (mg/mL)
For a 5 mg vial prepared at 1 mg/mL, the math is direct. Divide 5 mg by 1 mg/mL, and the required solvent volume is 5 mL. The same calculation applies whether the target is 1 mg/mL, 2 mg/mL, or 5 mg/mL, which are common working concentrations in current reconstitution guidance.
A concentration error is not a bookkeeping issue. It changes the solution you think you made.
That point matters because every later dilution inherits the original calculation. A small arithmetic miss becomes a larger experimental miss once you begin aliquoting or dosing. Write the target concentration down before you draw solvent, confirm the units, and use calibrated tools instead of estimating by eye.
The target concentration has to fit how the material will be handled. A volume that is too small makes pipetting less accurate and increases loss on the wall of the vial or syringe. A volume that is too large can make storage and repeated sampling inconvenient. The right answer is the one that matches the protocol and still gives you reliable handling at the bench.
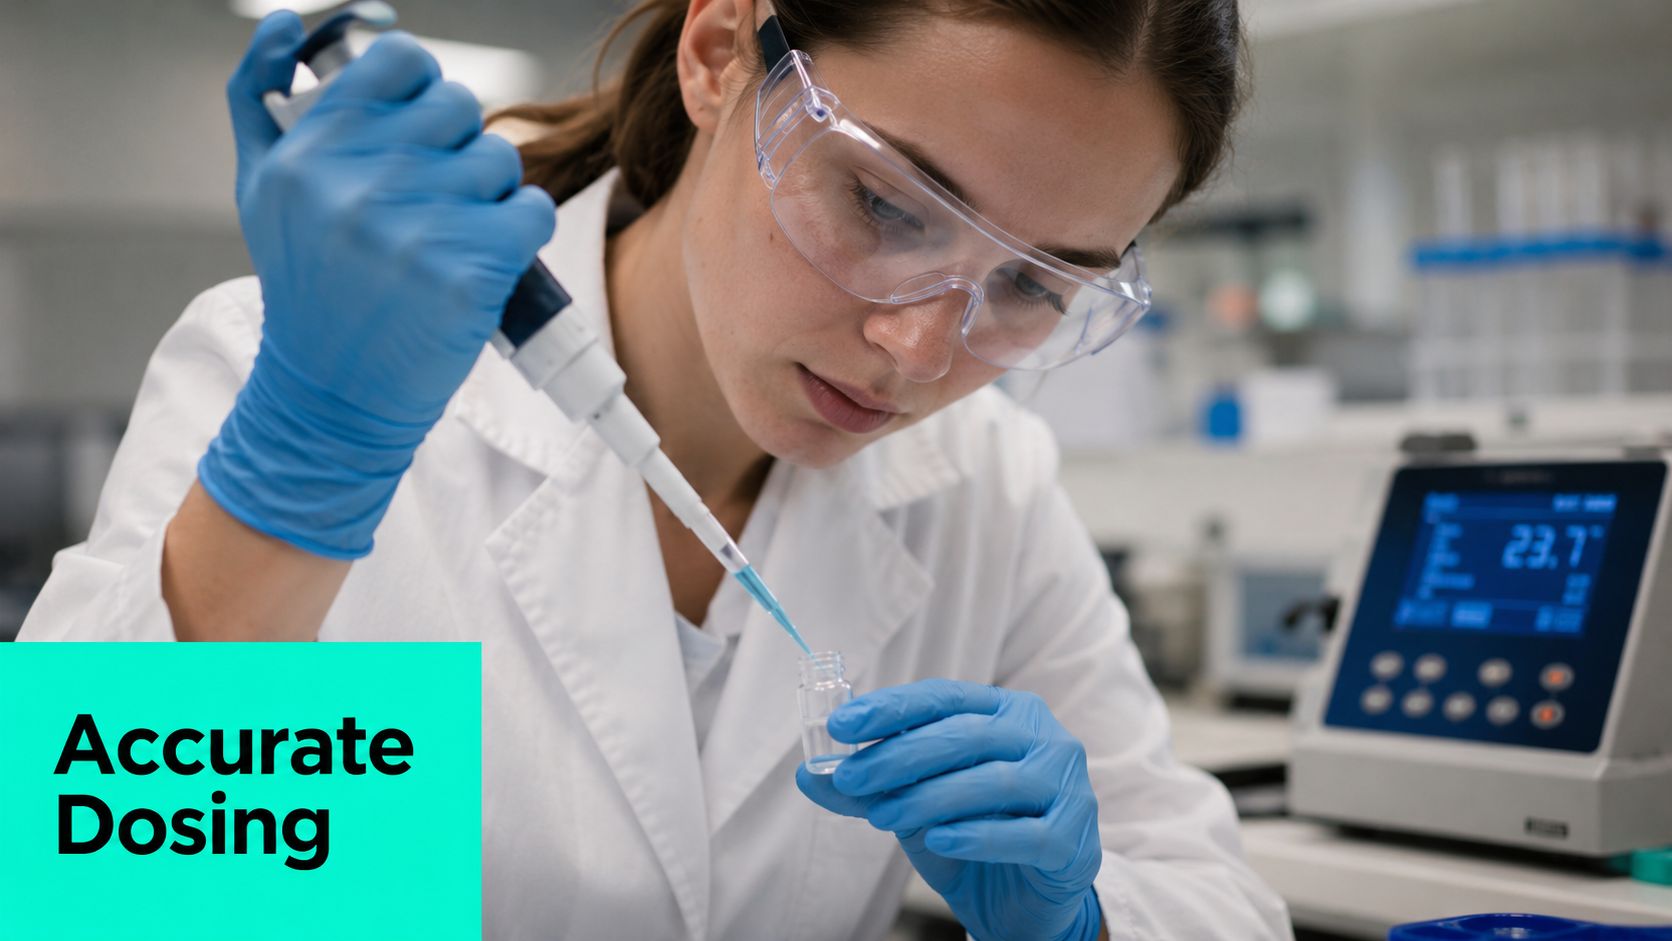
A quick bench check helps before any solvent is drawn. If you want to confirm the volume against a dosing target, a research concentration calculator from Celonyx Labs can reduce transcription mistakes when you are working through several vials or repeating the same protocol. The point is not speed by itself. It is avoiding a concentration that is awkward to measure or inconsistent with the rest of the workflow.
Good reconstitution starts with a clear endpoint, not with the syringe already in hand. If the calculation only makes sense after mixing has begun, the workflow gets messy fast and the chance of a wrong dilution goes up. Write the target first, verify the solvent volume, then prepare the transfer.
The reason to be strict here is reproducibility. The same vial should behave the same way when it is prepared the same way, and that depends on the concentration being correct from the start.
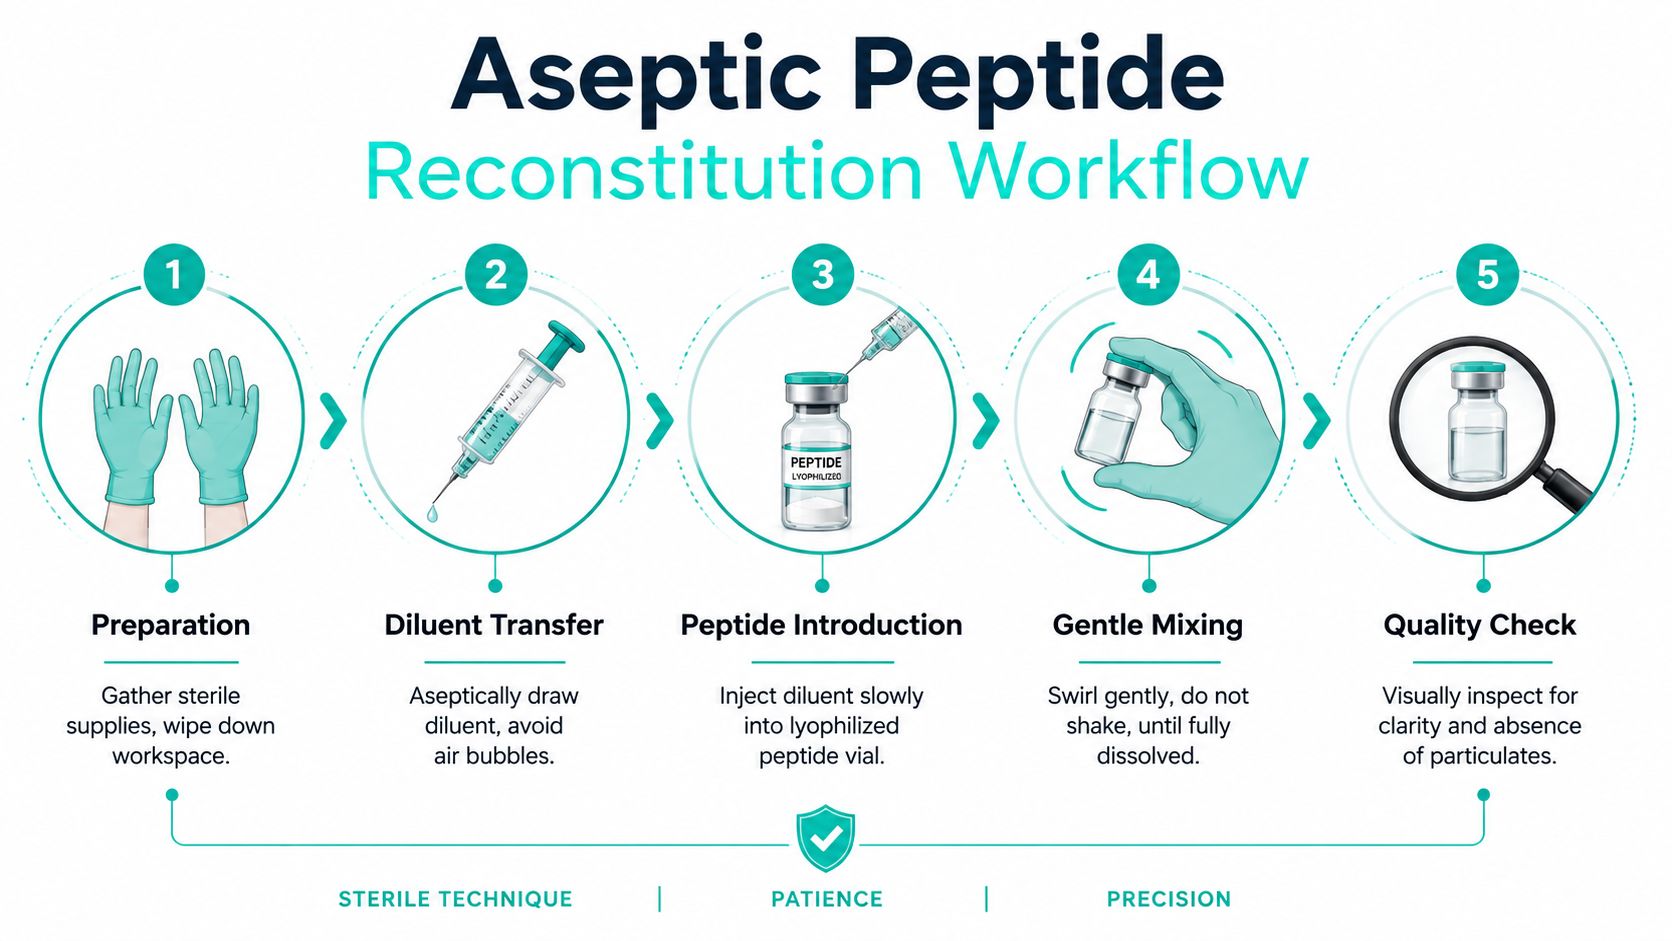
The best reconstitution workflow is calm, sterile, and deliberately unhurried. You're trying to protect a delicate solid from contamination and unnecessary mechanical stress, so every motion should support that goal. Aseptic practice isn't a formality, it's the part that keeps the peptide solution usable and the result defensible.
A widely used approach is to let the peptide vial and bacteriostatic water sit at room temperature for 20–30 minutes before mixing, then add solvent slowly and avoid shaking, as described in this step-by-step peptide reconstitution guide. That waiting period matters because cold glass and cold solvent can make handling less predictable and can encourage condensation or uneven wetting. Gentle dissolution usually takes only a few minutes, so there's no reason to rush into forceful mixing.
Wipe the vial stoppers with alcohol and let them dry before puncture. That small pause lowers the chance of carrying contaminant into the vial, which is especially important when the material may be used more than once.
Draw the calculated volume with a sterile syringe, check for bubbles, and inject the solvent slowly down the inside wall of the vial. The goal is to let the liquid run along the glass and pool gently at the bottom rather than hitting the peptide cake head-on. Direct force at the powder can create foaming, increase shear, and make the material harder to dissolve cleanly.
A few lab habits make this part smoother:
Swirl the vial in a slow circular motion. Don't shake it. Shaking introduces mechanical stress and bubbles, while gentle swirling promotes dissolution without abusing the molecule. If the solution is still not fully clear, let it sit undisturbed for a short time and inspect again rather than escalating force.
A practical note from standard handling: BAC-water reconstituted peptide solutions are commonly stored at 2–8°C afterward, so if you're working with a bacteriostatic-water preparation, keep the post-mix path clear before you begin. That avoids extra handling once the solution is ready. If you're setting up a fresh workflow, a separate storage reference such as this peptide storage guide can help keep the bench plan consistent with the vial's later use.
Once the powder is in solution, the peptide is no longer in its most protected state. Storage becomes part of the same procedure, not a separate task left for later. The way you label, cool, and reuse the vial decides whether the work you just did still holds value next week.
Write the peptide name, concentration, solvent, and date of reconstitution on the vial before it goes back into storage. That habit prevents mix-ups during busy weeks, especially when several vials are in rotation and similar labels start to look alike. Keep the label clear enough that anyone at the bench can read it without guessing.
The point of the label is traceability. If a result looks off later, the label helps separate age, solvent, concentration, and handling as possible causes. A simple label is often the only record that shows whether the problem began at the bench or during storage.
Refrigeration at 2–8°C is the standard short-term storage target for many reconstituted peptide solutions, which matches the handling guidance already used in the workflow section. Lower temperatures slow the changes that can push a solution away from its original state. Repeated warming, over-handling, and extra transfers all add risk without improving the material.
Freeze-thaw cycling is another common source of loss. If a protocol requires longer holding times, prepare smaller working portions instead of thawing the same vial again and again. That reduces stress on the solution and keeps the remaining material from being exposed to the bench more than necessary. For a practical storage reference, this peptide storage guide can help keep the post-mix plan aligned with how the vial will be used later.
Storage discipline protects your original prep. A clean reconstitution can still fail later if the vial is left unlabelled, repeatedly warmed, or handled like a stock bottle.
There is no single storage rule that fits every peptide, every assay, and every lab schedule. A bacteriostatic-water preparation may suit one workflow and create problems in another, especially when the downstream system is sensitive to preservatives. The solvent choice and storage plan should be written together, because the storage environment can affect stability, and the assay can be sensitive to whatever remains in the vial.
Troubleshooting gets easier when you stop treating every visual issue as the same problem. Cloudiness, visible particles, and stubborn dissolution each point to a different failure mode, and the fix depends on what you're seeing. The safest first move is to pause and inspect before adding more force, more solvent, or more speculation.
Cloudiness can mean the peptide hasn't fully dissolved, the solvent choice isn't ideal for the chemistry, or the concentration is too aggressive for that material. It can also signal precipitation or an incompatible pH or ionic environment. In that situation, gentle warming, a longer rest period, or a solvent adjustment may help, but if the material still won't clear, don't force the issue.
Foam is usually a sign of agitation, not success. Let the vial sit undisturbed and give the bubbles time to collapse on their own. If the foam keeps returning, the mixing step was too aggressive, so the correct response is to reduce force on the next vial rather than trying to “fix” this one with more shaking.
Some peptides are slower to dissolve, especially when the chemistry is less forgiving. Confirm that the correct diluent was used, confirm the temperature is appropriate, and allow more time before changing the plan. The troubleshooting guide above notes that hydrophobic peptides and certain assay conditions can demand a different solvent or different pH, which is why the answer sometimes is to re-evaluate the starting choice rather than the last step.
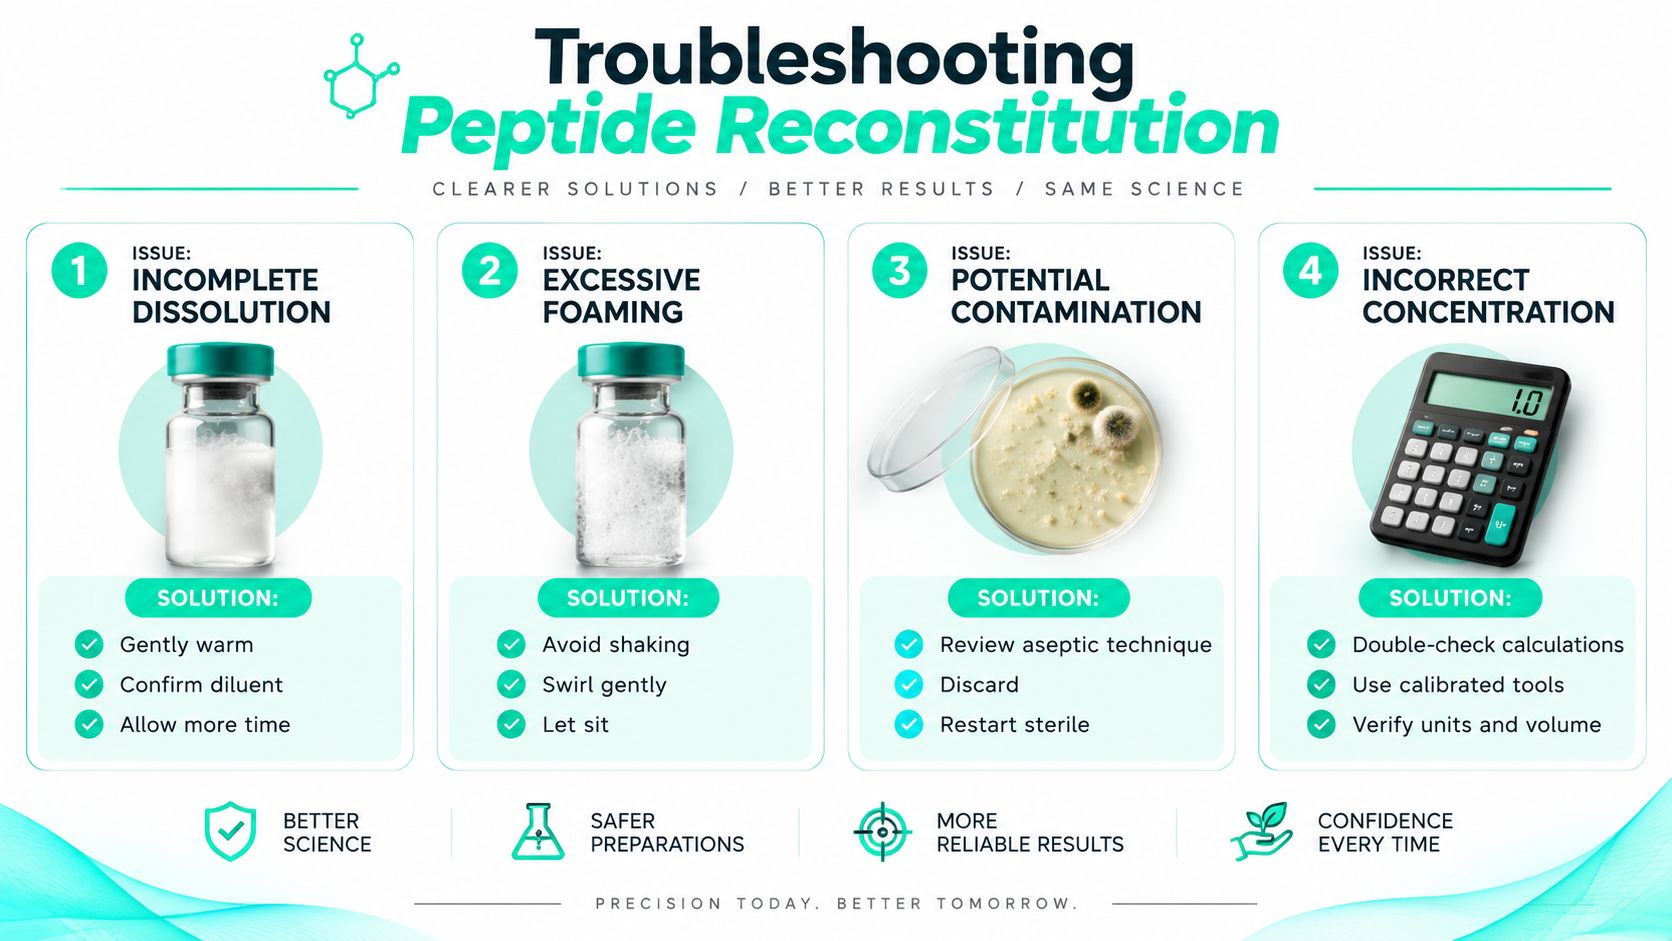
Don't try to rescue a vial that shows signs of contamination. Review the aseptic steps, discard the compromised solution, and restart with sterile materials. A contaminated prep is worse than no prep at all, because it can waste time, skew data, and contaminate downstream work.
Celonyx Labs supplies research peptides through an online catalog, along with ordering support, published policies, and educational blog content that fits workflows like this one. If you're building a clean bench routine for peptide handling, visit Celonyx Labs to review current research materials and supporting information before your next reconstitution.
Is bacteriostatic water the same as sterile water? No. Compare preservatives, vial handling and peptide

How do you know if a peptide vial has gone bad? Quarantine changes, check storage

Can too much bacteriostatic water ruin a peptide vial? Yes, if it overfills the vial
FOR RESEARCH USE ONLY. Products sold by Celonyx Labs are intended exclusively for laboratory and scientific research. They are not intended for human or veterinary use, consumption, diagnosis, treatment, cure, or prevention of any disease. By purchasing from this site, you acknowledge that you understand the intended research purpose of these materials and agree to comply with all applicable laws and regulations.